Preparing Pelangi
Related Images

Tie dye is a resist dyeing technique. It is done by tying up sections of a fabric with string and then dyeing it once, or many times. Once untied, it reveals a pattern across the fabric, usually vibrant and colourful. How you tie the string determines the pattern – and there are many to choose from to transform a simple piece of fabric!
“The Javanese name for this kind of goods is “planggi”.
The many colours associated with dyeing this material meant that it was traditionally referred to as Pelangi or rainbow cloth. In Central Java it is sometimes called Plangi, from the Javanese word plong which can mean ‘empty’. This refers to the parts of the cloth left undyed by the process. In Javanese tradition, white was not a colour itself but was seen as immaterial – a void that could be brought to life by the vibrant dyes. Pelangi is dyed multiple times, a cloth of many colours and a variety of meaningful patterns.
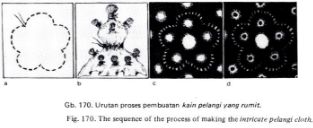
So: let’s follow the numbers assigned to each illustration by Driessen and learn how to dye a Pelangi in ten steps!
Step number one.
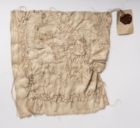
The silk is folded and small patterns are stitched on to the flat layers with a strong vegetable fibre. These small flower shapes are one of the more intricate designs for traditional tie dye.